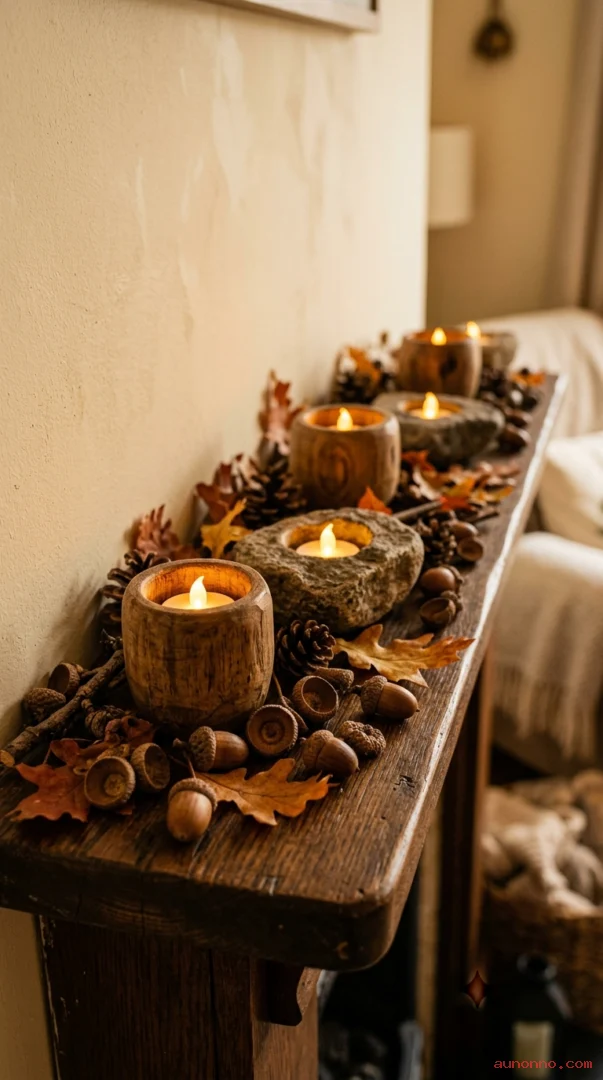
Handmade fall decorations bring seasonal color and texture into your home without making the space feel mass-produced. These 15 fall decorating ideas use simple materials such as dried leaves, pumpkins, fabric, branches, pinecones, and reclaimed wood to create welcoming displays for entryways, tables, mantels, porches, and cozy corners.
Dried Leaf Garland for the Mantel
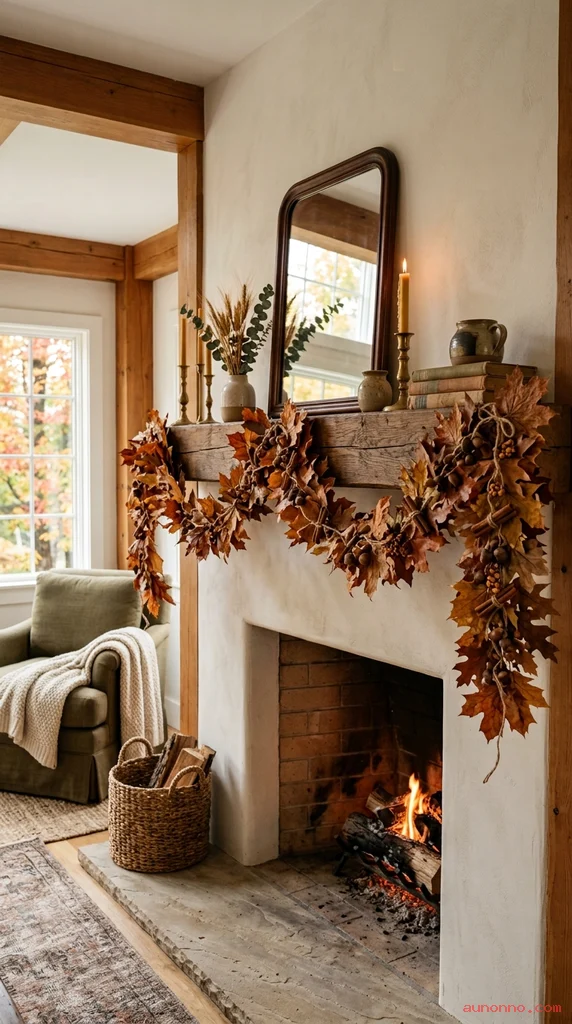
Materials needed: Dried maple, oak, or beech leaves; natural twine; small wooden clips or craft glue; scissors; optional acorns, cinnamon sticks, and eucalyptus.
How to make it: Press the leaves flat, arrange them in an overlapping row, and attach them to the twine with clips or small dots of glue. Add the optional natural accents between groups of leaves, then drape the finished garland across the mantel.
A dried leaf garland gives a fireplace mantel an instant autumn look. Collect sturdy maple, oak, or beech leaves, press them flat, and attach them to twine with small wooden clips or discreet dots of craft glue.
Layer the leaves so their edges overlap and vary the colors from golden yellow to copper and russet red. A few cinnamon sticks, acorns, or short sprigs of eucalyptus can add shape and a gentle natural scent.
Keep the garland away from candles, fireplaces, and heat vents. For a longer-lasting decoration, use fabric leaves or seal real leaves with a light coat of clear craft sealer before hanging them.
Painted Mini Pumpkin Centerpieces
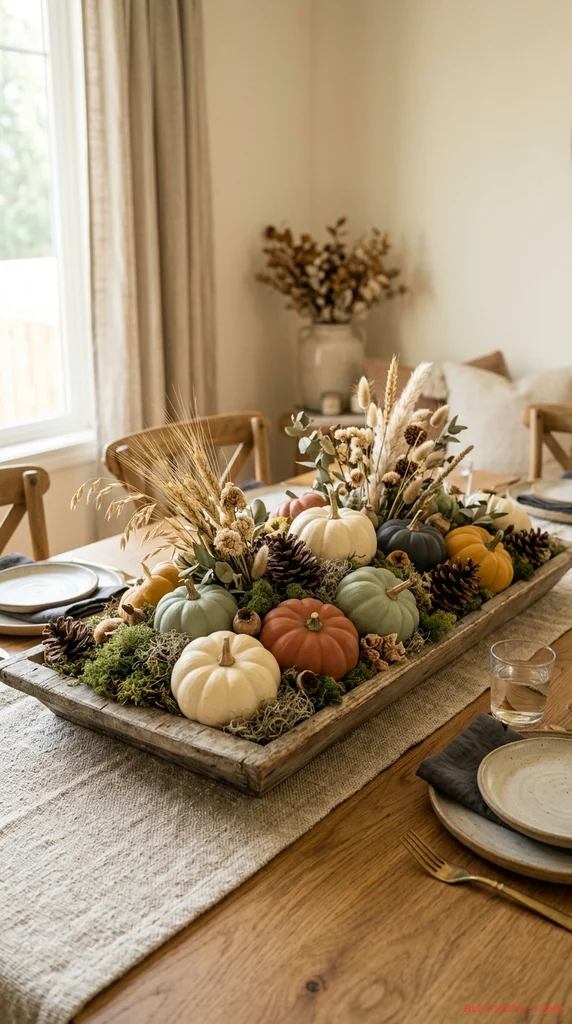
Materials needed: Small pumpkins or faux pumpkins; acrylic paint; paintbrushes; matte sealer; shallow wooden tray; moss; pinecones; and dried grasses.
How to make it: Clean and dry the pumpkins, apply two thin coats of paint, and let them cure before adding sealer. Arrange the finished pumpkins in the tray with moss, pinecones, and dried grasses.
Small pumpkins make an easy handmade centerpiece for a dining table, coffee table, or kitchen island. Paint them in warm shades such as cream, sage, terracotta, muted mustard, or charcoal instead of using bright orange on every piece.
Arrange the pumpkins in a shallow wooden tray with moss, dried grasses, and a few pinecones. Mixing smooth painted surfaces with rough natural textures creates a display that feels collected rather than overly arranged.
Use acrylic craft paint for quick coverage and add a matte sealer when the pumpkins will be handled often. Faux pumpkins work well for a reusable autumn centerpiece that can be stored and brought out each year.
Rustic Pinecone Wreath
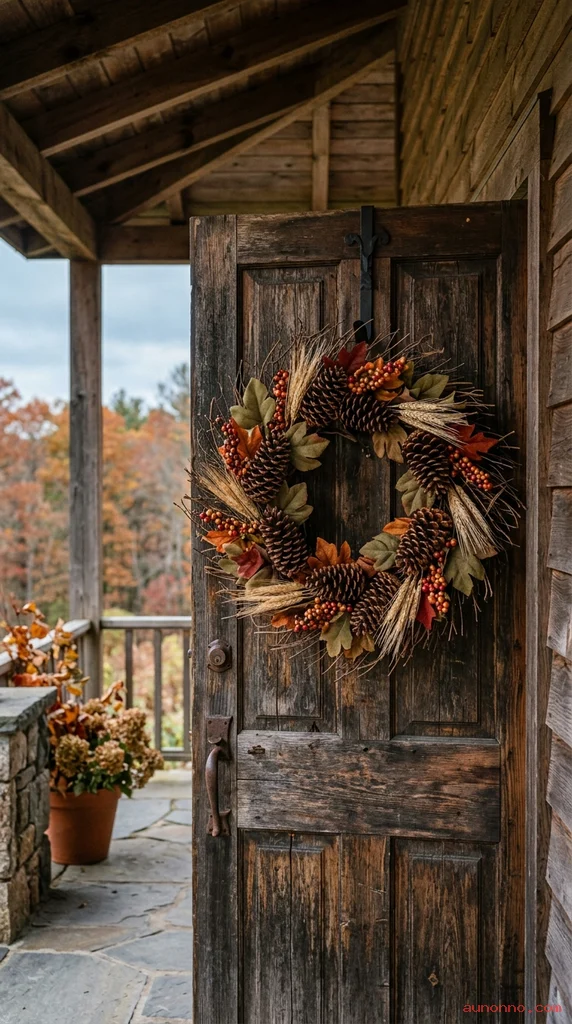
Materials needed: Grapevine, straw, or wire wreath form; pinecones; floral wire or low-temperature glue; dried berries; fabric leaves; wheat stems; and twigs.
How to make it: Sort the pinecones by size, attach the largest ones around the wreath form, and fill the gaps with smaller cones. Secure the berries, leaves, wheat, and twigs in small clusters before hanging the wreath.
A pinecone wreath adds rustic fall charm to a front door, porch wall, or interior window. Start with a grapevine, straw, or wire wreath form, then attach pinecones in overlapping layers with floral wire or a low-temperature glue gun.
Fill open spaces with dried berries, small fabric leaves, wheat stems, or twigs. Keep the palette restrained so the pinecones remain the main feature and the wreath looks natural from a distance.
For outdoor use, choose dry weather and protect the finished wreath with a suitable clear spray. Check the attachment points at the start of each season and replace loose pinecones before hanging it again.
Burlap and Plaid Table Runner
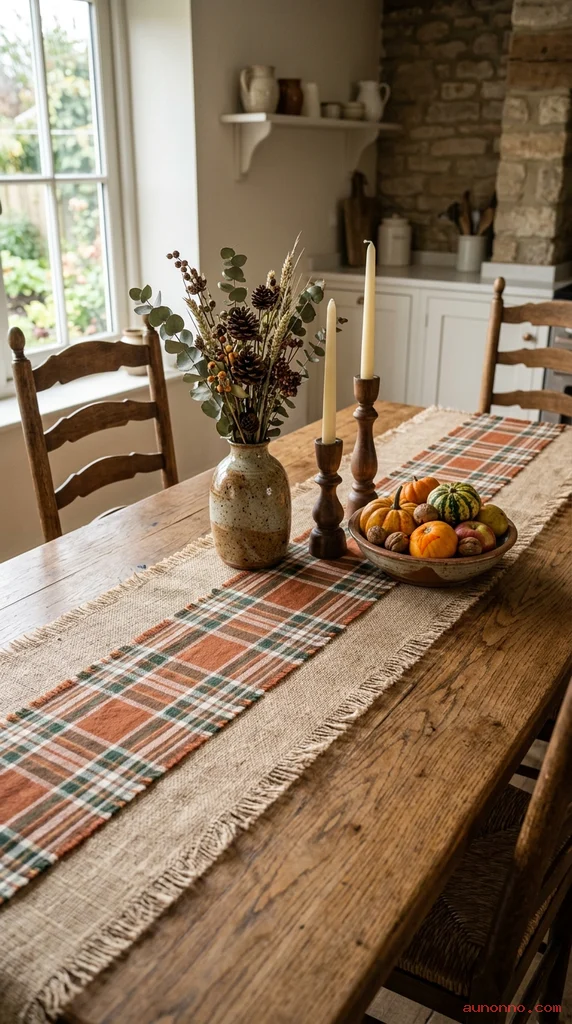
Materials needed: Burlap; plaid cotton fabric; fabric scissors; ruler; sewing machine or needle and thread; and an iron.
How to make it: Cut the burlap to the desired table length and add narrow plaid fabric bands along the edges or center. Hem the fabric, press the seams flat, and leave the burlap edges fringed if you want a rustic finish.
A handmade table runner can change the mood of an autumn dining area without covering the entire table. Combine a strip of burlap with narrow bands of plaid cotton, then finish the edges with a simple hem or intentional fringe.
Choose plaid colors that echo the rest of the room, such as rust, forest green, cream, navy, or warm brown. Place the runner beneath a ceramic vase, wooden candleholders, and a low bowl of seasonal produce.
Burlap sheds fibers, so shake it outdoors before use and spot-clean it when needed. Cotton plaid strips make the runner softer and easier to wash, while a removable center panel allows you to change the look for different gatherings.
Acorn Candle Holders
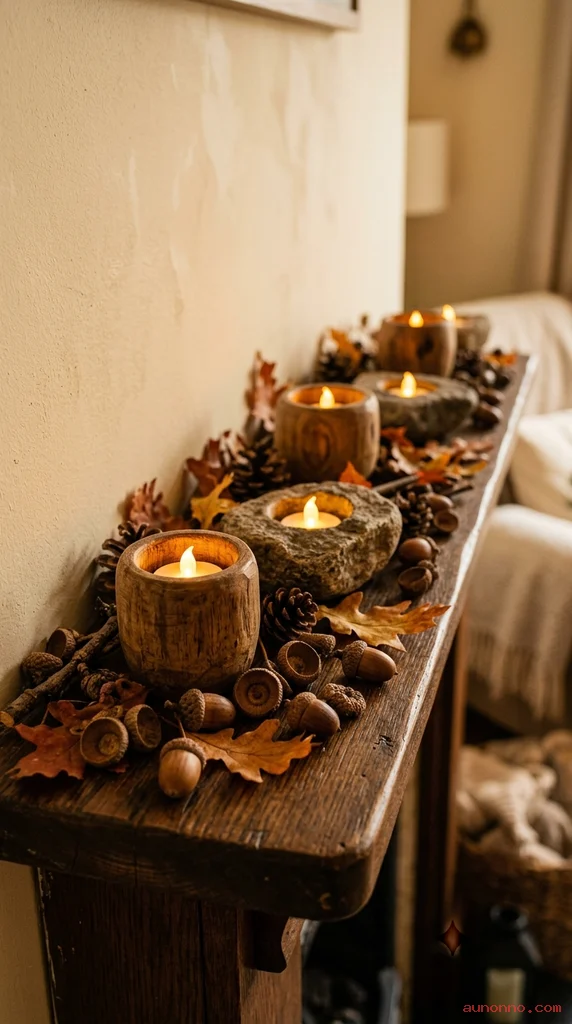
Materials needed: Shallow wooden cups, air-dry clay bases, or small stone dishes; acorns and acorn caps; pinecones; battery-operated tea lights; and optional craft glue.
How to make it: Place the battery tea light in the center of each base and arrange acorns, caps, and pinecones around the outside. Glue only the surrounding pieces if needed, keeping every natural material clear of the light.
Acorn candle holders create a small woodland-inspired accent for a mantel, shelf, or dinner table. Use shallow wooden cups, air-dry clay bases, or small stone dishes to hold the candles safely and keep the acorns around the outer edge.
Arrange acorn caps, whole acorns, and tiny pinecones around battery-operated tea lights. Warm white lights bring out the earthy colors while avoiding the open-flame risk of natural materials.
If you use real candles, keep the acorns well away from the flame and never leave the display unattended. Battery candles are the better choice for homes with children, pets, or narrow shelves.
Mason Jar Leaf Lanterns
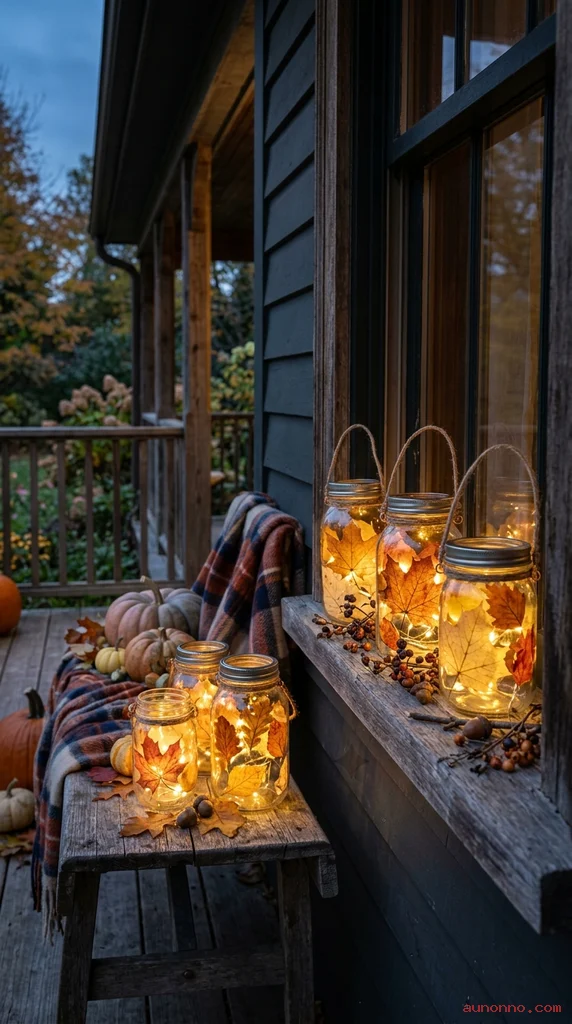
Materials needed: Clear mason jars; faux or paper leaves; removable adhesive; twine or copper wire; and battery-powered string lights or LED tea lights.
How to make it: Attach the leaves to the outside of each jar or place paper leaves inside the glass. Add the light, wrap twine or wire around the rim, and arrange the jars at different heights.
Mason jar lanterns offer a simple way to add soft autumn lighting to a porch, windowsill, or dining table. Press faux leaves against the outside of clear jars with removable adhesive, or place small paper leaves inside the glass.
Fill each jar with a battery-powered string light or LED tea light. A band of twine, leather cord, or copper wire around the rim gives the lanterns a finished handmade detail.
Use jars of different heights to build a more interesting display. Keep outdoor lanterns under a covered area, and remove paper leaves if rain or heavy moisture is expected.
Felt Pumpkin Bunting
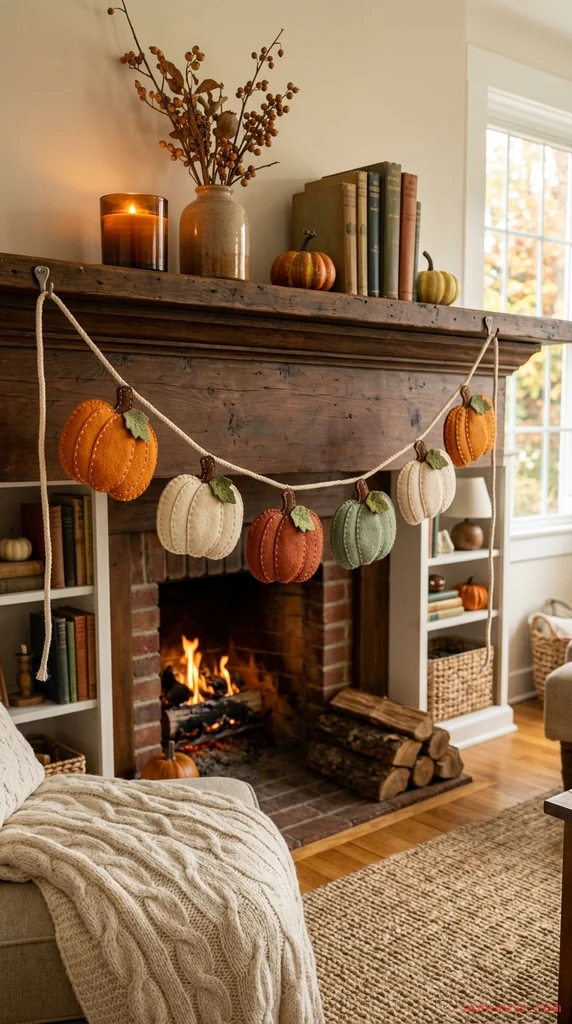
Materials needed: Orange, cream, rust, and green felt; paper pumpkin templates; fabric scissors; embroidery floss; needle; cotton cord; and a hole punch or sewing needle.
How to make it: Cut pumpkin, stem, and leaf shapes from the felt, then add simple stitched details. Thread or stitch the pieces onto the cotton cord with even gaps and hang the bunting in a dry indoor spot.
Felt pumpkin bunting brings a playful handmade touch to a kitchen, nursery, office, or family room. Cut pumpkin shapes from orange, cream, rust, and muted green felt, then add simple stitched stems and leaf shapes.
Thread the pieces onto cotton cord with small gaps between them. You can make each pumpkin slightly different by changing the shape, adding a stitched line, or layering two felt colors.
Felt is lightweight and easy to store after the season. Hang the bunting above a doorway, across a shelf, or along a mantel, but keep it clear of fireplaces, stovetops, and other heat sources.
Wheat and Dried Grass Wall Hanging
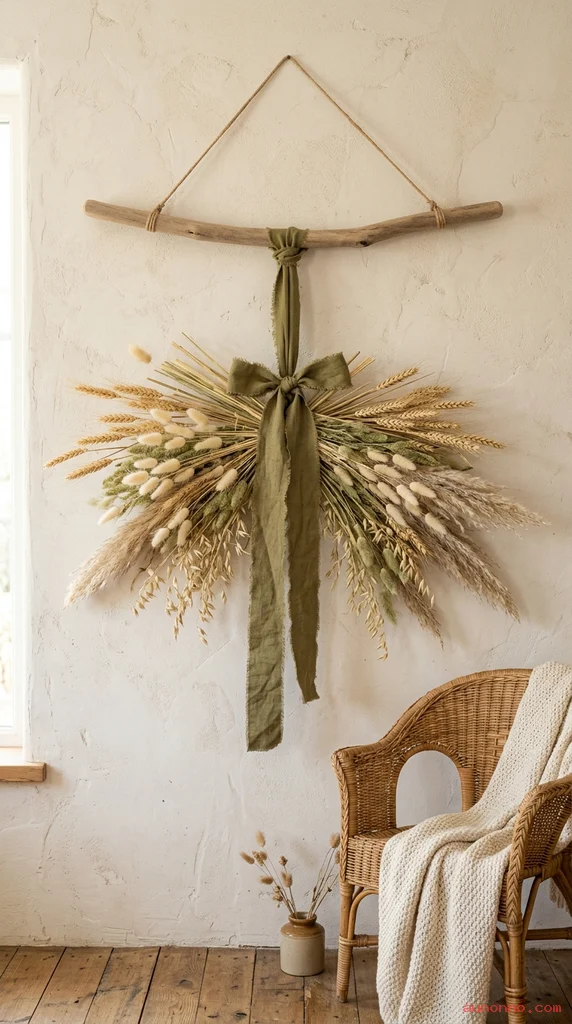
Materials needed: Wheat stalks; dried grasses; a smooth branch; natural cord; scissors; and linen ribbon.
How to make it: Group the botanicals by length and tie each bundle to the branch so the stems form a soft fan. Cover the main knot with linen ribbon, trim loose ends, and attach a hanging loop to the branch.
A wheat and dried grass wall hanging adds height and movement to an autumn room. Gather wheat stalks, pampas grass, bunny tails, or dried oats and tie them to a smooth branch with natural cord.
Use groups of different lengths to create a soft fan shape rather than a perfectly even bundle. A linen ribbon in rust, cream, or olive green can cover the knots and connect the arrangement to nearby textiles.
Hang the piece in a dry location away from direct sunlight and forced-air vents. Turn the bundle occasionally so it keeps an even color and dust it gently with a soft brush.
Reclaimed Wood Pumpkin Stack
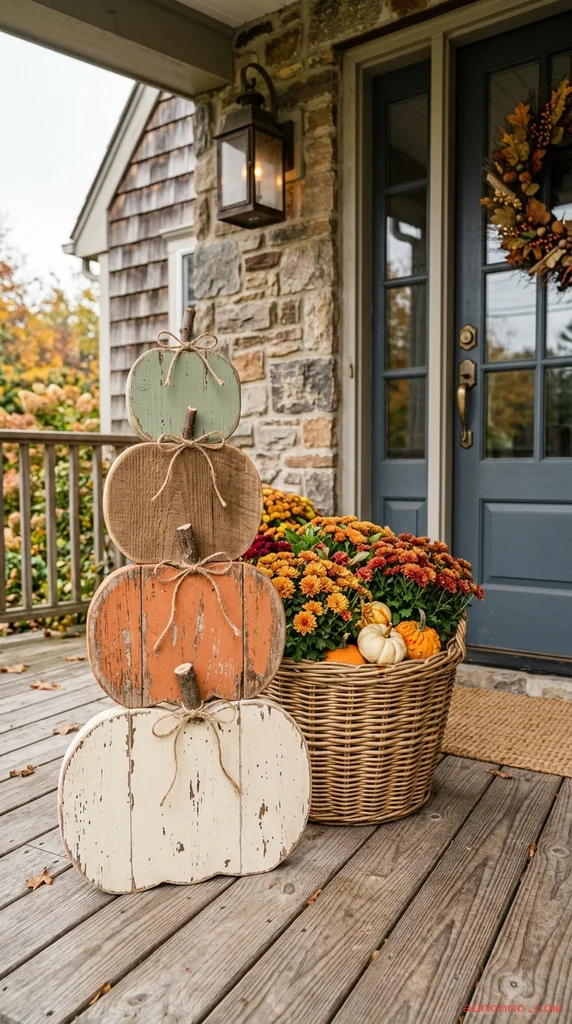
Materials needed: Reclaimed wood boards; pumpkin templates; saw; sandpaper; paint; paintbrushes; twig stems; jute; dowels or brackets; and exterior-rated sealer for porch use.
How to make it: Cut or assemble three pumpkin silhouettes in different sizes, then sand the edges. Paint, distress, and seal the pieces before stacking them with dowels or hidden brackets and adding twig stems.
A stack of reclaimed wood pumpkins gives a porch, entryway, or farmhouse shelf a sturdy seasonal focal point. Cut or assemble three pumpkin silhouettes in different sizes, then sand the edges so the wood looks worn but remains safe to handle.
Paint the pieces in layers of cream, orange, brown, or sage and lightly sand selected areas for a distressed finish. Add twig stems and a small loop of jute at the top to reinforce the pumpkin shape.
Secure the stack with hidden brackets, dowels, or strong outdoor adhesive if it will stand where children or pets may bump it. Seal porch decorations with an exterior-rated finish to reduce damage from moisture.
Cinnamon Stick Starburst
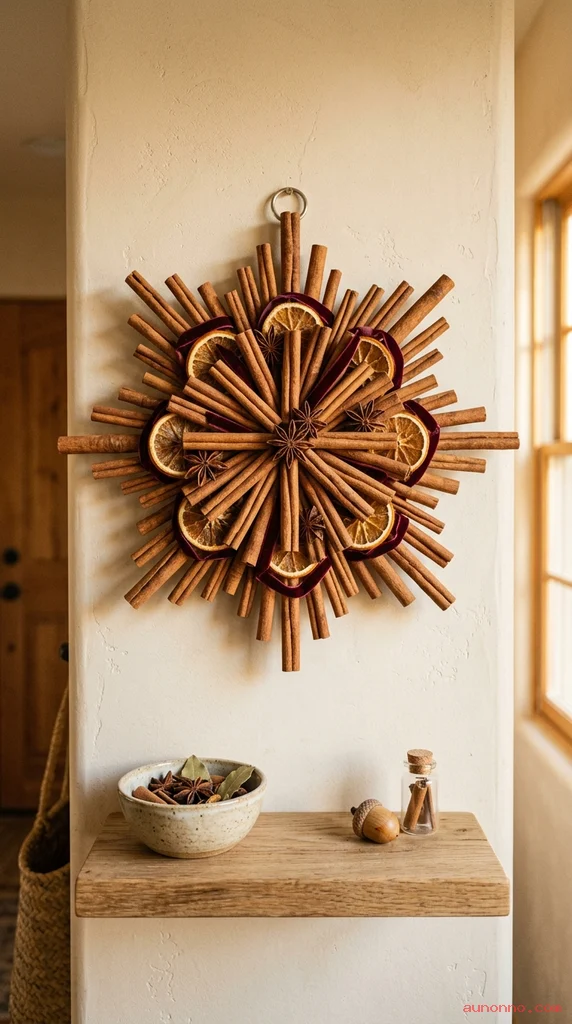
Materials needed: Equal-length cinnamon sticks; small cardboard or wood center; craft glue or thin craft wire; dried orange slices; star anise; and ribbon.
How to make it: Mark the center point and arrange the cinnamon sticks in an even radial pattern. Secure them to the backing, add the spice accents and ribbon, and let the adhesive dry fully before displaying the starburst.
A cinnamon stick starburst is a compact fall decoration for a wall, shelf, or gift-wrapping station. Arrange equal-length cinnamon sticks around a small cardboard or wood center, then secure them with glue or thin craft wire.
Leave the sticks natural or add small dried orange slices, star anise, and a velvet ribbon. The warm brown color works well with neutral autumn decor and adds a subtle seasonal fragrance.
Keep the finished piece dry so the spices do not soften or develop mold. The scent may fade over time, but a few drops of cinnamon-safe fragrance oil on the back can refresh it without changing the appearance.
Hand-Stitched Leaf Pillow Covers
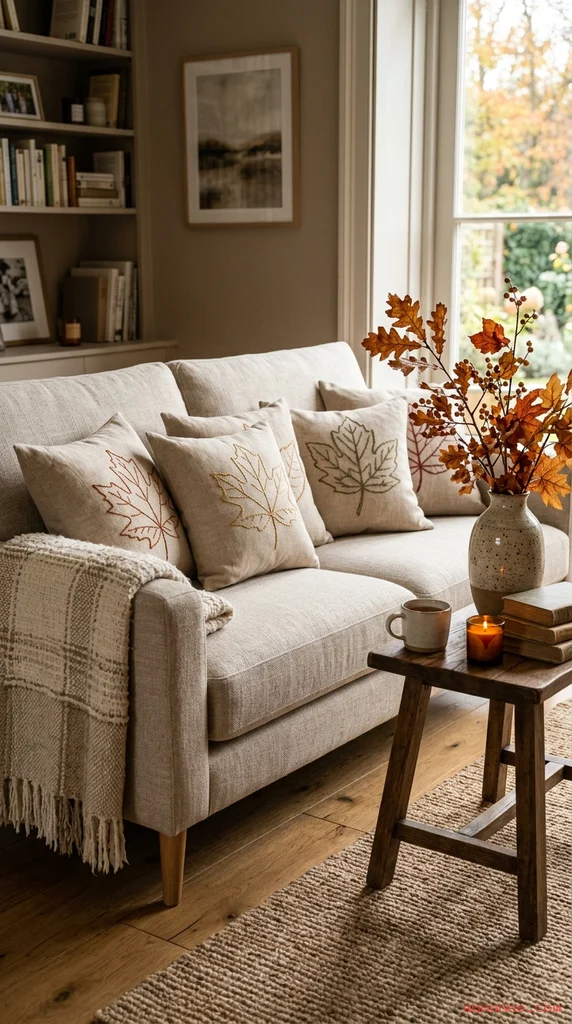
Materials needed: Plain linen or cotton pillow cover; embroidery floss; embroidery needle; washable fabric marker; scissors; and a pillow insert.
How to make it: Sketch leaf outlines with a washable marker and stitch over the lines using a simple outline stitch. Remove the marker, let the cover dry, insert the pillow form, and place it away from open flames.
Hand-stitched leaf pillow covers bring fall color to a sofa, reading chair, or bedroom bench. Start with a plain linen or cotton cover and add simple leaf outlines using embroidery floss in rust, gold, olive, or deep red.
You can stitch one large leaf in the center or create a scattered pattern across the front panel. A hidden zipper or envelope opening makes the cover easy to remove when the season ends.
Wash the fabric according to its fiber content and test the thread for colorfastness before cleaning. Keep the design restrained if the room already contains plaid blankets, patterned rugs, or busy artwork.
Corn Husk Flower Arrangement
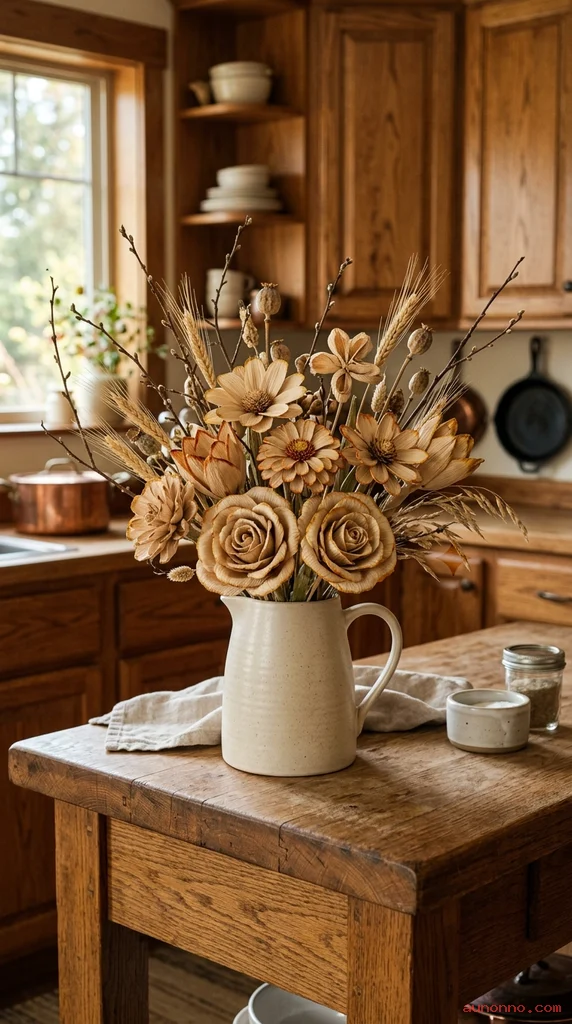
Materials needed: Clean corn husks; warm water; floral wire or thin wooden stems; floral tape or thread; ceramic pitcher; dried wheat; and optional craft paint.
How to make it: Soak the husks until flexible, shape layered petals around the wire, and tie or tape the base. Let the flowers dry completely, then arrange them in the pitcher with wheat and branches.
Corn husk flowers create a distinctive autumn arrangement from a humble natural material. Soak clean husks until flexible, shape them into layered petals, and tie the bases around floral wire or thin wooden stems.
Use the flowers in a ceramic pitcher with dried wheat, bare branches, or preserved leaves. Natural tan husks can stay uncolored, or you can tint the petal edges with diluted craft paint for a softer tonal effect.
Let the husks dry completely before placing them in a vase or storage box. The flowers are lightweight, so anchor the stems with floral foam, pebbles, or a heavy vessel to prevent tipping.
Fabric Scrap Pumpkin Bowl Filler
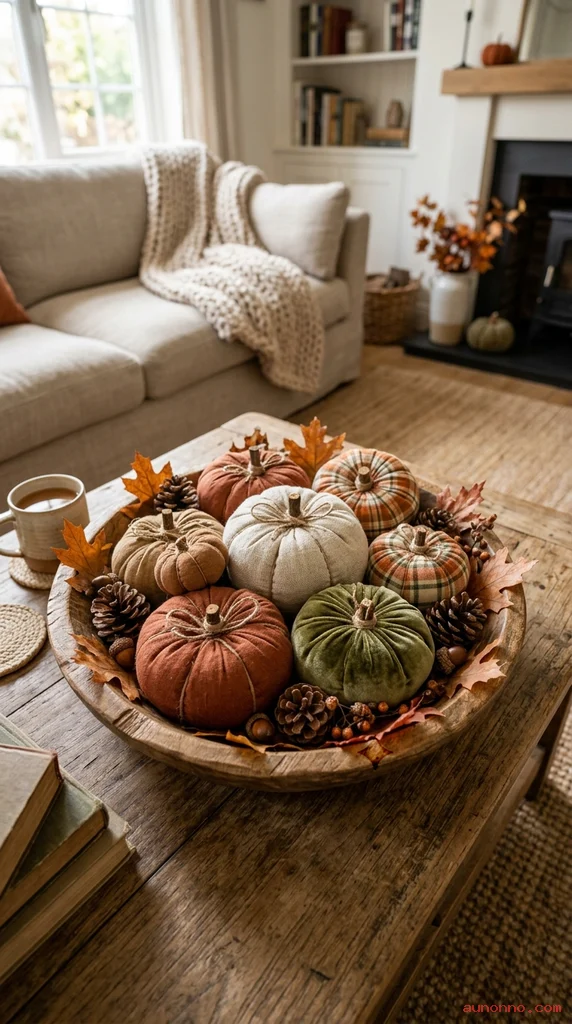
Materials needed: Cotton, velvet, or flannel fabric scraps; paper circle template; fabric scissors; needle and thread; polyester stuffing; twig stems; and a wooden bowl or basket.
How to make it: Cut fabric circles, gather the edges around a small amount of stuffing, and stitch the opening closed. Add a twig stem to each pumpkin, then arrange the finished pieces with pinecones and leaves in the bowl.
Fabric scrap pumpkins turn leftover cotton, velvet, or flannel into useful seasonal bowl filler. Cut fabric circles, gather the edges around a small amount of stuffing, and close the opening with thread before adding a stem.
Make a mix of solid colors and subtle patterns in a coordinated autumn palette. Place the pumpkins in a wooden bowl, wire basket, or glass cloche with a few pinecones and dried leaves.
Use polyester stuffing for a washable, lightweight result and avoid loose beads in homes with small children. Store the pumpkins in a breathable fabric bag so the materials stay dry between seasons.
Pressed Leaf Art Frames
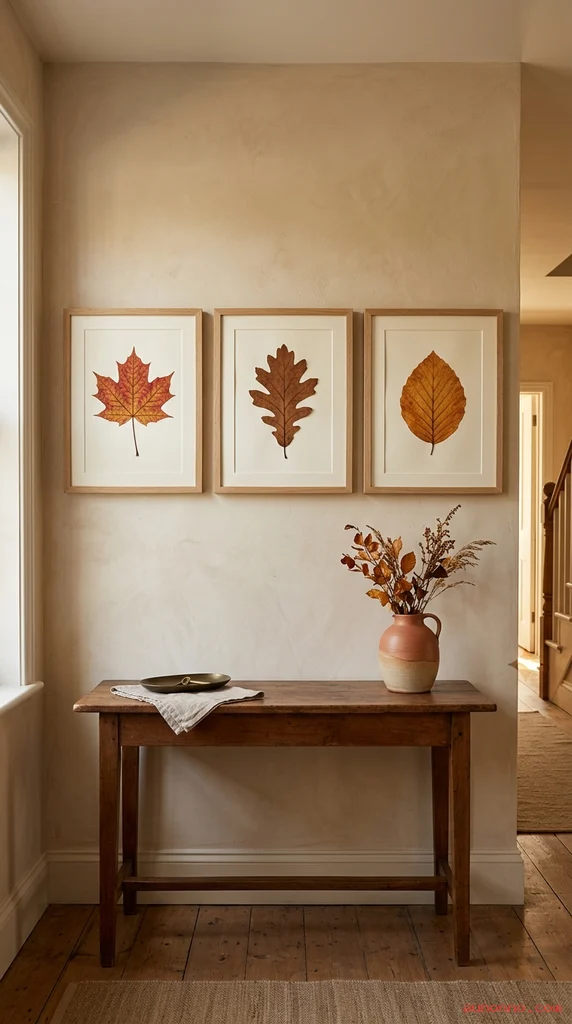
Materials needed: Flat autumn leaves; heavy books or flower press; archival paper; simple picture frames; removable mounting corners; and tweezers.
How to make it: Press the clean leaves until fully flat and dry, then position each one on archival paper. Secure the leaves with mounting corners, place the paper in the frames, and hang the finished art away from direct sunlight.
Pressed leaf art offers a quiet, natural decoration for a hallway, office, or bedroom. Select flat leaves with clear shapes, press them between heavy books or in a flower press, and mount them on cream paper inside simple frames.
Arrange one leaf per frame for a clean gallery wall, or create a single composition with overlapping stems and small seed pods. Thin wood frames, black frames, and brass-toned frames each create a different fall styling effect.
Handle pressed leaves with tweezers or clean fingertips because they become fragile when dry. Use archival paper and removable mounting corners if you want to preserve the pieces or change the arrangement later.
Autumn Door Basket
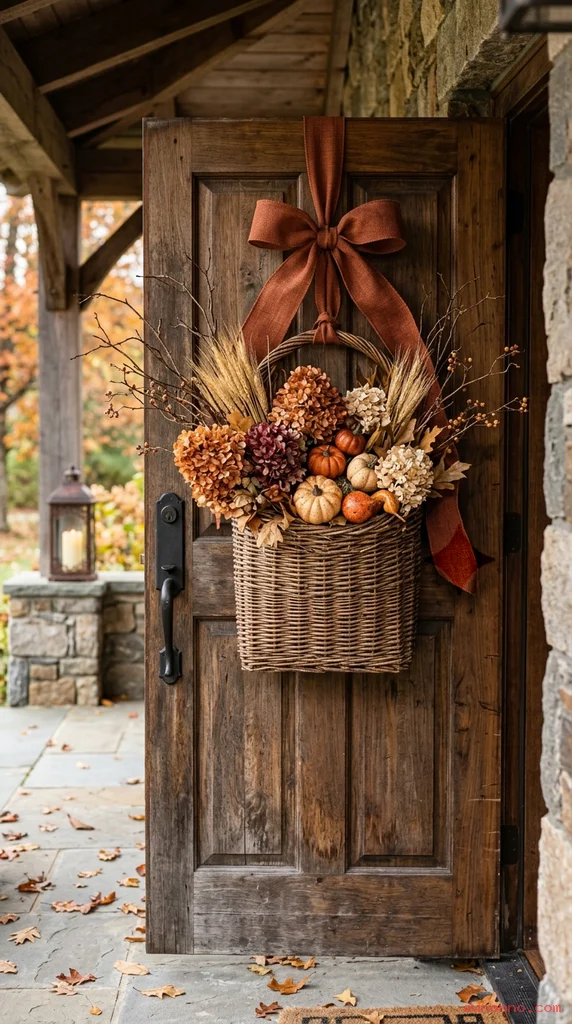
Materials needed: Sturdy woven basket; dried hydrangeas; branches; wheat; faux pumpkins; wide ribbon; hanging loop or hook; and optional floral foam.
How to make it: Place the tallest branches and wheat toward the back of the basket, then add hydrangeas and pumpkins in front. Secure the arrangement with floral foam or wire, finish with a ribbon, and hang it beneath a covered porch when using dried materials.
An autumn door basket offers a fresh alternative to a traditional wreath. Fill a sturdy woven basket with dried hydrangeas, branches, wheat, faux pumpkins, and a wide ribbon in a warm seasonal color.
Place the fullest materials toward the back and let a few stems angle outward for movement. A basket with a flat back or strong hanging loop is easier to secure to a door without scratching its surface.
Protect the arrangement from strong wind and prolonged rain. Faux botanicals are a practical choice for an exposed entryway, while dried stems work best beneath a covered porch or inside an entry hall.
How can I make handmade fall decorations on a small budget?
Use materials you already have, such as fabric scraps, glass jars, cardboard, branches, leaves, and old picture frames. Seasonal produce, thrifted baskets, and reclaimed wood can also become attractive decor with simple paint or careful arrangement.
What are the best natural materials for fall crafts?
Dried leaves, pinecones, acorns, wheat, corn husks, branches, cinnamon sticks, and dried flowers all work well. Choose clean, fully dry materials and inspect them for insects, moisture, or signs of mold before bringing them indoors.
How long do homemade fall decorations last?
Dried and preserved materials can last for several seasons when they stay cool, dry, and out of direct sunlight. Fabric, painted wood, and faux botanicals usually last longer than fragile real leaves or fresh produce.
How can I use handmade fall decor in a small apartment?
Choose compact pieces such as jar lanterns, pressed leaf frames, a small table centerpiece, or a narrow garland. Wall-mounted and vertical decorations add seasonal style without taking up valuable floor or counter space.
Are handmade fall decorations safe around children and pets?
Battery-operated lights are safer than open flames, and sturdy decorations are better than small loose parts. Keep acorns, berries, wire, fragile leaves, and scented materials out of reach when children or pets may chew or move them.
How do I keep dried fall decorations from getting dusty?
Use a soft paintbrush, microfiber cloth, or hair dryer on a cool, low setting to remove dust gently. Store clean decorations in lidded containers with tissue paper and keep them away from damp basements or hot attics.
What colors work well for handmade autumn decorations?
Rust, copper, mustard, cream, olive, burgundy, brown, and charcoal create a warm fall palette. Pick two or three main colors and repeat them across textiles, painted accents, and natural materials for a coordinated look.
Conclusion
The best handmade fall decorations combine seasonal materials with the way you actually use your home. A leaf garland can warm up a mantel, a painted pumpkin arrangement can anchor a table, and a basket or wreath can make the entryway feel ready for guests.
Choose a few projects that match your available space, craft skill, and storage needs. Small details such as natural texture, soft lighting, coordinated colors, and safe construction can make even a simple DIY fall decoration look thoughtful and inviting.